
 EN
EN  English
 Português



Cutting a brake chamber pushrod is a precision task that directly affects the safety and compliance of an air brake system. The correct length must match the specific brake chamber type, slack adjuster geometry, and manufacturer's stroke specifications. According to the Federal Motor Carrier Safety Regulations (FMCSR) Part 393.47, the pushrod stroke on a service brake chamber must not exceed 80% of its rated maximum stroke when the brakes are fully applied. Therefore, any cutting of a new or replacement brake chamber pushrod must result in a length that allows proper slack adjuster installation and a pushrod stroke within the legal limit. This guide provides the exact procedure, tool requirements, measurement techniques, and safety checks necessary for cutting a brake pushrod on heavy-duty vehicles, with data drawn from the Technology & Maintenance Council (TMC) Recommended Practice RP-638 and air brake manufacturer service bulletins.
Content
- Why Cutting a Brake Chamber Pushrod Is Necessary
- Pre-Cutting Measurements and Required Data
- Tools and Safety Equipment Required for Cutting
- Step-by-Step Procedure to Cut a Brake Chamber Pushrod
- Post-Cutting Verification and Brake Adjustment
- Common Mistakes When Cutting a Brake Pushrod
- Frequently Asked Questions About Cutting Brake Chamber Pushrods
- Can I cut a spring brake chamber pushrod the same way as a service chamber?
- What is the minimum thread engagement after cutting?
- Can a cut pushrod be re-threaded if the threads are damaged?
- How do I know if my pushrod is cut to the correct length after installation?
- Does cutting the pushrod affect the warranty of the brake chamber?
- Conclusion: Precision and Compliance in Pushrod Cutting
Why Cutting a Brake Chamber Pushrod Is Necessary
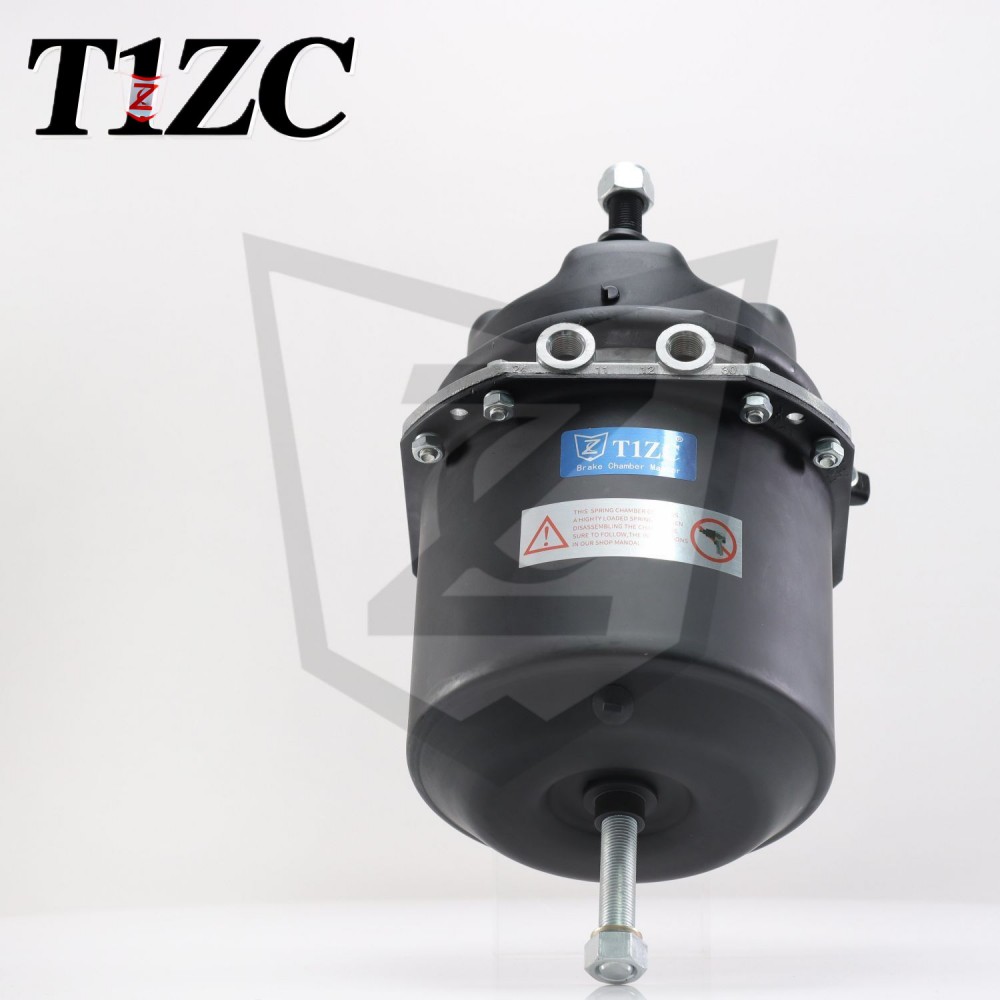
A service brake chamber pushrod often comes from the manufacturer at a generic extra-long length and must be cut to fit a specific axle and slack adjuster configuration. The pushrod connects the brake chamber diaphragm plate to the slack adjuster arm. If the pushrod is too long, the slack adjuster cannot be properly installed or will over-rotate, causing the brake to drag and overheat. If it is too short, the slack adjuster angle will be too steep at rest, reducing mechanical advantage and increasing stopping distance. The TMC RP-638 states that the ideal slack adjuster angle at rest should be between 90 and 100 degrees relative to the pushrod centerline. Achieving this angle requires cutting the brake chamber pushrod to a precise length based on actual vehicle dimensions, not a pre-cut assumption.
The need to cut arises primarily during brake chamber replacement or when converting between chamber sizes. The Commercial Vehicle Safety Alliance (CVSA) 2024 North American Standard Out-of-Service Criteria specifies that any air brake pushrod stroke exceeding the adjustment limit—typically 2.5 inches for a standard Type 30 clamp-ring chamber—renders the vehicle out-of-service. Cutting the pushrod to the correct length is the foundation for meeting these stroke limits during installation. A field survey by a major fleet maintenance organization published in Transport Topics in 2022 found that 12% of brake chamber replacements required pushrod length correction due to variations in axle brackets and slack adjuster arm lengths.
Pre-Cutting Measurements and Required Data
Accurate measurement before cutting is the single most important step. The required length of the brake pushrod is determined by the chamber's fully retracted position and the installed angle of the slack adjuster. The Society of Automotive Engineers (SAE) J1469 standard for air brake chambers specifies that the pushrod must engage at least 10 full threads into the clevis or yoke, and that no more than 1 inch of exposed thread should remain beyond the jam nut. To calculate the cut length, the following measurements must be taken with the chamber fully released and the slack adjuster installed on its camshaft at the correct angle.
The table below summarizes the key dimensional data for the most common clamp-ring brake chamber types, based on manufacturer specification sheets from leading air brake system suppliers. This data is essential to determine the starting reference before any cutting.
| Chamber Type | Nominal Pushrod Diameter (in.) | Standard Max Stroke (in.) | Factory Pushrod Length Range (in.) | Thread Size (UNF) |
|---|---|---|---|---|
| Type 20 | 0.625 | 2.25 | 6.0 - 9.5 | 5/8-18 |
| Type 24 | 0.750 | 2.50 | 7.0 - 11.0 | 3/4-16 |
| Type 30 | 0.750 | 2.50 | 8.0 - 13.0 | 3/4-16 |
| Type 36 | 0.875 | 3.00 | 9.0 - 14.0 | 7/8-14 |
Table: Dimensional specifications for common service brake chamber types. Factory pushrod length ranges represent as-supplied new lengths before cutting. Data consolidated from SAE J1469 and air brake component manufacturer catalogs.
Tools and Safety Equipment Required for Cutting
The cutting brake pushrod process requires tools that produce a clean, square cut without damaging the thread or causing heat-related metallurgical changes. A high-speed abrasive cut-off saw or a reciprocating saw with a fine-tooth bi-metal blade (18 to 24 teeth per inch) is the industry standard. Torch cutting is prohibited because it alters the heat treatment of the pushrod steel, which is typically medium-carbon steel with a tensile strength of 120,000 psi minimum. The following list enumerates all necessary equipment.
- Abrasive cut-off saw or reciprocating saw with a metal cutting blade — a chop saw with a 14-inch abrasive wheel provides the straightest edge. A portable band saw is an alternative but requires a stable fixture.
- Bench vise with soft jaws (brass or aluminum) — to clamp the pushrod without marring the threaded surface. The vise must be bolted to a rigid workbench capable of withstanding 200 pounds of lateral force.
- Thread file and chamfer tool — after cutting, the first thread must be restored to its original profile to ensure the clevis or yoke nut engages smoothly. A 60-degree thread file with the correct pitch is essential.
- Steel ruler or digital caliper with 0.01-inch resolution — for measuring the cut length. The TMC recommends a tolerance of plus or minus 0.030 inch on the final pushrod length.
- Personal protective equipment (PPE) — safety glasses meeting ANSI Z87.1, cut-resistant gloves rated to ANSI/ISEA 105 Level 4, and hearing protection when using a chop saw. Steel-toe boots are required per OSHA 1910.132 for heavy part handling.
- Marking tools: a permanent marker and a center punch to scribe the cut line before clamping.
Step-by-Step Procedure to Cut a Brake Chamber Pushrod
The actual cutting of a brake chamber pushrod follows a strict sequence to ensure dimensional accuracy and thread integrity. Every step must be performed with the chamber removed from the vehicle and the spring brake fully caged or released to prevent accidental actuation. The following ordered list details the complete process from measurement to final deburring.
- Measure the required pushrod length on the vehicle: With the old chamber removed, install the slack adjuster on the camshaft and position it at the recommended 90- to 100-degree angle relative to the anticipated pushrod line. Measure the distance from the center of the slack adjuster clevis pin hole to the face of the brake chamber mounting bracket. Subtract the compressed length of the chamber (the distance from the mounting face to the clevis pin center when the pushrod is fully retracted). This difference is the length of the pushrod to cut from the new chamber's factory rod.
- Mark the cut line on the new pushrod: Extend the new brake pushrod to its full out position. Measure from the center of the clevis pin hole back toward the chamber body to the cut length determined in step 1. Add 0.5 inch to allow for thread engagement and final adjustment. Scribe a clear line around the circumference of the rod using a permanent marker. Verify the measurement twice.
- Secure the pushrod in the vise: Clamp the pushrod at the chamber-side end, never on the threads that will be retained. Position the scribed line at least 2 inches from the vise jaws to provide clearance for the saw blade. Ensure the rod is level horizontally to produce a square cut.
- Cut the pushrod: Using the abrasive saw, make a continuous, steady cut directly along the scribed line. Apply moderate, even pressure. Do not force the blade or allow the rod to vibrate, as this produces a ragged edge. For a reciprocating saw, use a guide block clamped beside the cut line to maintain perpendicularity. Allow the cut piece to fall freely; do not catch it with a gloved hand. The cutting process generates temperatures up to 400 degrees Fahrenheit at the cut zone, which is localized and does not affect the overall heat treatment if cooled naturally in air.
- Chamfer and clean the cut end: Once cooled, remove the rod from the vise. Using a 60-degree thread file, carefully restore the lead thread by matching the existing thread pitch. Run a chamfer tool or a fine half-round file around the outer diameter to create a 30-degree bevel. This prevents cross-threading when the clevis or yoke is installed.
- Install the clevis and jam nut: Thread the clevis onto the freshly cut air brake pushrod until at least 10 full threads are engaged. The jam nut must then be tightened against the clevis to a torque of 40 to 55 foot-pounds for a 3/4-inch rod, as specified by TMC RP-618. Use a thread-locking compound rated for 300 degrees Fahrenheit on the jam nut threads to prevent loosening from vibration.
Post-Cutting Verification and Brake Adjustment
After cutting the brake pushrod and installing the chamber, a full functional test is mandatory. The pushrod stroke must be measured with the brakes fully applied at 90 to 100 psi air pressure, using a stroke indicator or a ruler held parallel to the pushrod. The FMCSR 393.47 limit for a Type 30 clamp-ring chamber is 2.5 inches; any measurement above this requires immediate adjustment or re-cutting. The manual slack adjuster must then be adjusted per the manufacturer's procedure to bring the running clearance between the brake linings and drum to the specified 0.020 to 0.030 inch. This clearance directly affects the pushrod stroke; a loose adjustment will cause excessive stroke even with a correctly cut pushrod.
The following parameters must be verified and recorded in the vehicle maintenance file, according to the TMC's VMRS code 013-000-002 for brake system repair.
- Pushrod stroke at 90 psi reservoir pressure: Must not exceed the chamber's rated stroke. For a Type 30, the maximum allowable is 2.5 inches.
- Slack adjuster angle at full application: Should be at least 90 degrees to the pushrod centerline. An angle less than 80 degrees indicates the pushrod is too short or the slack adjuster is incorrectly indexed.
- Thread engagement: A minimum of 10 threads must be visible inside the clevis after the jam nut is tightened. A borescope or a thread count gauge may be used for verification.
- No interference: The pushrod must not contact any brake hose, spring, or suspension component throughout the entire suspension travel. A full jounce and rebound test with the vehicle on a hoist is recommended.
- Leak test: Apply the brakes and hold for one minute. The pressure drop in the service reservoir should not exceed 3 psi per minute for a combination vehicle, per FMCSR 393.50.
Common Mistakes When Cutting a Brake Pushrod
The most frequent error in cutting brake chamber pushrods is failing to account for the compressed length of the chamber and instead cutting to an arbitrary length. Another critical mistake is using a torch or plasma cutter, which creates a heat-affected zone (HAZ) that reduces the steel's fatigue strength by up to 35% according to a study published by the American Welding Society on medium-carbon steel fasteners. A third common error is insufficient chamfering, which leads to cross-threading of the clevis and eventual pushrod thread failure. The following unordered list summarizes the key don'ts.
- Do not cut with a torch: Thermal cutting removes the zinc plating and temper, inviting corrosion and stress cracking at the cut end.
- Do not guess the length: Always measure the specific axle installation. Variations in bracket design and camshaft offset can change the required brake pushrod length by up to 1.5 inches between vehicle models.
- Do not cut too short: If the pushrod is cut more than 0.25 inch too short, the chamber must be replaced. Weld extensions are prohibited by CVSA out-of-service criteria and compromise the integrity of the assembly.
- Do not omit the jam nut: A missing or loose jam nut allows the clevis to rotate, changing the effective pushrod length and causing uneven brake application.
Frequently Asked Questions About Cutting Brake Chamber Pushrods
Can I cut a spring brake chamber pushrod the same way as a service chamber?
Yes, the spring brake chamber pushrod in the service side of a combination spring brake unit is cut using the same procedure. However, the spring brake section must be completely caged with the release bolt fully retracted before any work begins. Cutting the spring-side pushrod (if applicable on certain designs) requires complete disassembly of the chamber and should only be performed by a certified brake technician. Always consult the manufacturer's service manual for the specific chamber model.
What is the minimum thread engagement after cutting?
The SAE J1469 standard and TMC RP-618 require a minimum of 10 full threads of engagement between the brake pushrod and the clevis or yoke. This typically equates to 0.625 inch of thread length for a 5/8-18 thread and 0.625 inch for a 3/4-16 thread. Use a thread count gauge or measure the clevis depth to confirm engagement.
Can a cut pushrod be re-threaded if the threads are damaged?
Minor thread damage on a freshly cut air brake pushrod can be repaired using a thread file or a die of the correct size and pitch. If the damage extends beyond the first two threads or if the rod diameter is reduced by more than 0.010 inch, the pushrod must be re-cut further back or replaced entirely. A die should only be used to chase existing threads, not to cut new threads on an undersized rod, as this reduces the minor diameter below safe limits.
How do I know if my pushrod is cut to the correct length after installation?
The correct brake pushrod length is confirmed when the slack adjuster angle at rest is 90 to 100 degrees, the pushrod stroke at full application does not exceed the legal limit, and the vehicle achieves proper brake balance during a dynamometer test. A simple field check is to have an assistant apply and release the brakes while observing the slack adjuster rotation; it should move freely without binding and return fully to its stop. Any sign of the brake dragging indicates a pushrod that is too long.
Does cutting the pushrod affect the warranty of the brake chamber?
Most manufacturers allow cutting of the service brake chamber pushrod to the required length as part of normal installation, provided the procedure follows their published guidelines and the cut does not damage the chrome plating or threads. Cutting by torch or leaving less than the minimum thread engagement will void the warranty. It is essential to retain the installation record with the cut length measurement for any potential warranty claim.
Conclusion: Precision and Compliance in Pushrod Cutting
The process of how to cut a brake chamber pushrod is a fundamental skill in commercial vehicle maintenance that blends mechanical measurement, material science, and regulatory knowledge. A correctly cut pushrod ensures that the air brake system operates within its designed stroke range, preventing brake fade, uneven wear, and roadside violations. The data from TMC, SAE, and FMCSR consistently reinforce that the cut must be made to a specific length derived from the vehicle's actual geometry, not from a generic chart. Technicians who invest the time in precise measurement, use the proper cutting and finishing tools, and perform thorough post-installation verification will achieve a brake system that is safe, compliant, and reliable for the full service life of the brake chamber.