
 EN
EN  English
 Português
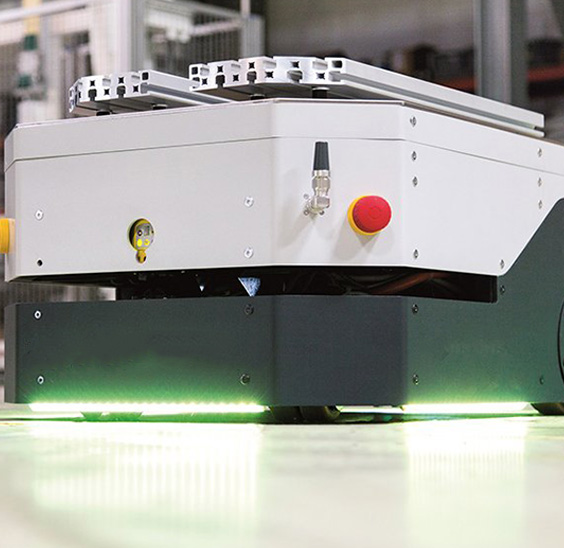


Caging a brake chamber mechanically compresses and locks the heavy-duty power spring inside a spring brake chamber, which releases the parking or emergency brake and allows the vehicle's wheels to turn freely — without requiring any air pressure in the brake system. It is a deliberate maintenance and emergency procedure used to move a vehicle that has lost air pressure or has a failed brake component.
On commercial trucks, trailers, and buses equipped with air brake systems, the parking brake is held applied by a large coil spring — not by air pressure. Air pressure is what keeps that spring compressed during normal driving. When air pressure drops below approximately 20–45 PSI (depending on system design), the spring releases automatically and locks the brakes. This is a fail-safe mechanism: the vehicle stops itself if the air system fails.
The problem arises when a vehicle needs to be moved — towed, repositioned in a shop, or rolled onto a lift — and there is no air supply available to release those spring brakes through normal means. That is precisely the situation where caging the brake chamber becomes necessary. Understanding when, why, and how to cage a brake chamber — and critically, when not to — is essential knowledge for any commercial vehicle technician, fleet operator, or roadside service professional.
This guide covers the full picture: how spring brake chambers work, exactly what the caging procedure does mechanically, step-by-step instructions, safety requirements, legal considerations, and the most frequently asked questions from technicians in the field.
Content
- How a Spring Brake Chamber Works: The Mechanism Behind Caging
- What Exactly Happens When You Cage a Brake Chamber
- When Should You Cage a Brake Chamber? Legitimate Use Cases
- How to Cage a Brake Chamber: Step-by-Step Procedure
- How to Uncage a Brake Chamber: Restoring Normal Operation
- Critical Safety Rules When Caging Brake Chambers
- Legal and Regulatory Requirements: What the Law Says About Caged Brake Chambers
- Caged vs. Normal Spring Brake Operation: Key Differences
- Frequently Asked Questions About Caging a Brake Chamber
How a Spring Brake Chamber Works: The Mechanism Behind Caging
Understanding what caging a brake chamber does requires first understanding the two-part structure of a spring brake chamber — because caging is a direct mechanical intervention in that structure.
A standard spring brake chamber — also called a piggyback chamber or combination chamber — consists of two separate sections bolted together:
- The service brake section (front half): A conventional diaphragm chamber that applies the brakes when air pressure is delivered to it during normal braking. This section operates on positive air pressure — push air in, push the brake rod out, apply the brake.
- The spring brake section (rear half): Contains a very powerful coil spring — typically rated at 1,800 to 2,400 lb-ft of stored energy — and a second diaphragm. This section operates in reverse: air pressure holds the spring compressed (brakes off); loss of air lets the spring extend (brakes on).
The push rod that applies the brake extends from the service section. The spring section's power spring acts through an internal push plate onto that same rod. When the air supply is cut or depleted:
- Air pressure behind the spring brake diaphragm drops.
- The power spring extends with full force.
- The push plate drives the push rod outward.
- The brake is applied — and held — with the full mechanical force of that spring.
The caging bolt — a threaded rod stored inside the spring section of every chamber — is the manual override for this system. Caging the brake chamber means threading that bolt through the chamber housing, attaching it to the push plate, and using a nut to draw the push plate back against the spring — compressing the power spring mechanically and holding it compressed, just as air pressure would, but without requiring any air.
What Exactly Happens When You Cage a Brake Chamber
When you cage a spring brake chamber, four specific mechanical outcomes occur simultaneously — each with direct consequences for vehicle behavior and safety.
| What Happens Mechanically | Immediate Effect | Operational Consequence |
| Power spring is compressed and locked | Spring force no longer acts on push rod | Parking brake is released |
| Push rod retracts | Brake cam or actuator moves to released position | Wheel rotates freely |
| Fail-safe braking is disabled | Spring cannot apply brakes automatically on air loss | Vehicle has no parking or emergency brake on caged axle |
| Service brake remains functional (if diaphragm is intact) | Air-applied service braking still works if air is available | Foot brake may still function normally |
Table 1: Mechanical outcomes of caging a spring brake chamber and their operational consequences
The most critical point in that table is the third row: caging a brake chamber completely disables the spring brake's fail-safe function on that axle end. If the vehicle is moved while caged and the service brake air system is also compromised — a common scenario in a breakdown situation — the vehicle may have no effective braking at all on that wheel position.
This is why caging brake chambers is a temporary emergency or maintenance procedure only — never a fix, and never a condition in which a vehicle should be returned to normal service.
When Should You Cage a Brake Chamber? Legitimate Use Cases
Caging a brake chamber is appropriate in a narrow, well-defined set of circumstances — all of which share one characteristic: the need to move a vehicle without air pressure, for a limited distance, under controlled conditions.
- Towing after a brake system failure: If a truck loses air pressure on the road and cannot build sufficient pressure to release the parking brakes through normal means, caging the chambers on the drive or trailer axles allows the vehicle to be towed to a repair facility. Federal Motor Carrier Safety Administration (FMCSA) regulations require that a disabled commercial vehicle be moved to the nearest safe location — caging is the standard method when an air supply vehicle is unavailable.
- Shop maintenance and repair: During brake overhaul work, technicians cage the spring brake before removing the chamber or working on brake components to prevent the spring from releasing unexpectedly. OSHA regulations and chamber manufacturers specify caging as a mandatory safety step before disassembling a spring brake chamber.
- Moving a vehicle onto a lift or dolly: When a vehicle with a depleted air system needs to be repositioned in a shop — rolled from one bay to another, placed on wheel dollies, or moved onto a frame rack — caging the brakes on the affected axles allows free movement.
- Trailer storage repositioning: When a trailer has been sitting long enough for air to bleed down and the parking brakes have set, caging allows manual repositioning within a yard or dock area where an air supply hose cannot reach.
In all of these cases, the vehicle should be moved only the minimum necessary distance, chocked immediately upon stopping, and the brake system repaired and properly tested before returning to service. A caged brake chamber is a red flag that a repair is incomplete — not a solution.
How to Cage a Brake Chamber: Step-by-Step Procedure
The correct brake chamber caging procedure requires only basic hand tools but demands strict attention to safety at every step — the power spring inside a spring brake chamber stores enough energy to cause serious injury or death if released uncontrolled.
Tools and Equipment Required
- Caging bolt: The threaded rod stored inside the spring brake chamber itself, typically in a hole in the rear housing marked with a dust cap or plug. Most chambers use a 3/8-inch or 1/2-inch caging bolt approximately 5–7 inches long.
- Appropriate wrench or socket: Matching the caging nut — typically 15/16-inch or 1-inch for standard North American chambers.
- Wheel chocks: Mandatory before beginning. The vehicle must be chocked on a wheel that will remain braked throughout the procedure.
- Safety glasses and gloves: Standard PPE for any brake work.
Step-by-Step Caging Procedure
- Chock all wheels that will remain braked. Never begin caging until the vehicle is secured against rolling. If caging all axles simultaneously — as in a complete tow preparation — use a dolly or tow truck to control the vehicle before removing the last brake.
- Locate the caging bolt port. Look for a rubber plug or dust cap in the center of the rear face of the spring brake section (the larger rear portion of the piggyback chamber). Remove the plug — the caging bolt is stored inside this port.
- Extract the caging bolt. The bolt is typically clipped or stored loosely inside the port. Pull it out fully and inspect it — a bent, corroded, or damaged caging bolt should not be used. Replace it before proceeding.
- Insert the caging bolt into the port and align with the push plate. Thread the bolt inward until it contacts the push plate inside the chamber. This requires gentle turning to find the engagement — do not force it.
- Thread the retaining nut onto the exposed bolt end. Hand-tighten the nut until it contacts the chamber housing face.
- Tighten the nut with a wrench in increments. Turn the nut progressively — never more than one full turn at a time — drawing the push plate toward the rear of the chamber and compressing the power spring. You will feel significant resistance as the spring compresses. Most chambers require 20–35 turns of the nut from initial contact to full compression.
- Confirm the push rod has retracted. Look at the push rod extending from the front of the chamber — it should have moved inward, away from the slack adjuster. The brake should now be released at that wheel.
- Verify the wheel rotates freely. Spin the wheel by hand (or observe during vehicle movement) to confirm the brake is fully released before loading or towing.
- Tag the chamber. Attach a clearly visible tag or label to the caged chamber identifying it as caged and out of service. This alerts any subsequent operator or technician to the condition before the vehicle moves under its own power.
How to Uncage a Brake Chamber: Restoring Normal Operation
Uncaging a brake chamber — returning it to normal spring brake operation — is the reverse of the caging procedure and must always be completed before the vehicle is returned to service.
- Chock the vehicle and ensure the air system is functional with adequate pressure (at least 90 PSI in the spring brake circuit) before uncaging. The air pressure will take over holding the spring compressed once the caging bolt is removed.
- Build system air pressure fully. Do not begin uncaging until the air gauges read within the normal operating range — typically 100–120 PSI. The air must be ready to hold the spring the moment the bolt is withdrawn.
- Back off the caging nut progressively — the reverse of tightening. Turn it in equal increments, allowing the air pressure to take the spring load gradually.
- Remove the caging bolt fully and store it back in its port. Replace the dust cap or plug.
- Apply and release the parking brake control in the cab to verify the spring brake is functioning correctly — the brake should apply firmly when the control is activated and release fully when air is applied.
- Remove wheel chocks and perform a full brake system inspection before releasing the vehicle for service.
WARNING: Never uncage a brake chamber without confirmed air pressure in the system. If the caging bolt is removed while the spring brake circuit has no air, the full stored energy of the power spring will release instantly and violently through the push rod — causing serious injury to anyone in the path of the rod or nearby components.
Critical Safety Rules When Caging Brake Chambers
Spring brake chambers are among the most dangerous components on a commercial vehicle from a workshop safety perspective — the power spring stores enough energy to cause fatal injuries if mishandled. These rules are non-negotiable.
| Safety Rule | Reason | Consequence of Violation |
| Always chock wheels before caging | Releasing the spring removes the only braking force | Vehicle rolls uncontrolled |
| Never attempt to disassemble a caged or uncaged spring brake | Spring energy release is catastrophic | Fatal or serious injury from spring ejection |
| Use only the correct caging bolt for the chamber | Wrong bolt may not engage push plate correctly | Bolt failure under spring load, uncontrolled release |
| Tag caged chambers visibly | Alerts subsequent operators to unsafe condition | Vehicle driven without parking brake; regulatory violation |
| Do not operate the vehicle on public roads with caged brakes | FMCSA regulations prohibit it; no emergency brake capability | Out-of-service order, fines, liability in accident |
Table 2: Critical safety rules for caging and uncaging spring brake chambers with reasons and consequences
Legal and Regulatory Requirements: What the Law Says About Caged Brake Chambers
Operating a commercial vehicle with caged brake chambers on a public road is a federal violation in the United States under FMCSA regulations — and a comparable offense under transport authority rules in Canada, the European Union, and Australia.
Under FMCSA 49 CFR Part 393.47, commercial motor vehicles must have functioning parking and emergency brake systems capable of holding the vehicle on any grade on which it is operated. A caged spring brake chamber provides neither parking nor emergency brake capability. During a roadside inspection, a caged chamber is an automatic out-of-service (OOS) condition under the Commercial Vehicle Safety Alliance (CVSA) North American Standard Out-of-Service Criteria.
Key legal points for fleet operators and owner-operators:
- Towing exception: A vehicle being towed under controlled conditions (on a flatbed or with a tow bar, not under its own power) with caged brakes is generally permitted for the purpose of moving it to a repair facility. The towing vehicle must have fully functional brakes.
- On-property movement: Moving a vehicle within a private property yard or terminal with caged brakes for maintenance purposes is not a federal highway violation, but occupational safety regulations (OSHA in the United States) still require wheel chocking and proper procedures.
- Inspection documentation: If a roadside inspector discovers a caged chamber during an inspection, the vehicle will be placed out of service until the brake system is properly repaired and the chamber is uncaged with a functioning air system confirmed.
- Carrier liability: A carrier that dispatches a vehicle with known caged brakes on a public road faces significant liability exposure in the event of an accident — caged brakes would be considered evidence of a knowingly defective vehicle.
Caged vs. Normal Spring Brake Operation: Key Differences
The table below summarizes the critical operational differences between a caged brake chamber and a normally functioning spring brake chamber, to make the implications of each state clear.
| Characteristic | Normal Operation | Caged Chamber |
| Parking brake function | Fully operational via spring | Disabled |
| Emergency brake function | Activates automatically on air loss | Disabled |
| Service brake function | Fully operational (air-applied) | Operational if air system is intact |
| Air pressure required to release | Yes — typically 90+ PSI | No |
| Road-legal status | Legal for all road use | Out of service — road use prohibited |
| Intended duration | Indefinite normal service life | Temporary only — repair and uncage ASAP |
Table 3: Side-by-side comparison of normal spring brake operation versus a caged brake chamber state
Frequently Asked Questions About Caging a Brake Chamber
How do I know if a brake chamber is already caged?
The most reliable visual indicator is the caging bolt protruding from the rear face of the spring brake section with a nut threaded onto its exposed end. On a normally operating chamber, the caging bolt port is covered by a dust cap or rubber plug and the bolt itself is stored flush inside. Additionally, a caged brake will not apply when the parking brake control in the cab is activated — the wheel will spin freely regardless of the control position. If a chamber was recently caged, a tag or warning label may also be attached.
Can I cage a brake chamber without the original caging bolt?
No — and this is a critical safety point. Never attempt to substitute another threaded rod or bolt for the original caging bolt. The caging bolt is specifically engineered to the correct thread pitch, diameter, material strength, and length for the chamber it is designed for. An undersized or incorrectly threaded substitute bolt can fail catastrophically under the spring load — releasing the power spring suddenly during the caging process. If the original caging bolt is missing, damaged, or corroded, source the correct replacement bolt for that specific chamber model before proceeding.
Does caging the brake chamber damage it?
A properly performed caging procedure does not damage the chamber if it is executed correctly with the correct bolt, in the correct sequence, without forcing the bolt or over-torquing the nut. However, repeatedly caging and uncaging a chamber as a workaround for a persistent air system problem — rather than fixing the underlying fault — accelerates wear on the diaphragm, push plate, and spring. A chamber that has been caged multiple times should be inspected for seal integrity before returning to service. Any chamber that has been subjected to a shock load, physical impact, or corrosion should be replaced rather than caged and reused.
How many brake chambers need to be caged to move a vehicle?
It depends on the vehicle configuration and axle layout. On a typical Class 8 tractor-trailer with spring brakes on the drive axles and trailer axles, all spring brake chambers on the drive axles must be caged to allow the tractor to roll freely — usually four chambers on a tandem drive axle configuration. Trailer axles require separate attention. Steer axle chambers on most tractors are service-only chambers (no spring brake), so they do not require caging. Always identify which axles are equipped with spring brakes on the specific vehicle before beginning the procedure.
What is the difference between caging a brake chamber and using a manual release?
Some air brake systems include a manual release valve — a physical knob or lever on the brake valve assembly that, when pulled, vents the spring brake circuit and allows the springs to release the parking brake while bypassing the cab control. This is distinct from caging: a manual release uses the system's own valve to vent air from the spring brake circuit, while caging mechanically compresses the spring inside the chamber itself. Manual release valves are available on some trailers and buses for emergency towing; caging is the mechanical backup when no air supply and no functional manual release is available.
How long can a vehicle remain with caged brake chambers?
There is no defined safe maximum time — but the practical answer is: only as long as the repair takes. A vehicle with caged brakes must not enter normal service and must not be left unattended on a slope or in an unsecured area without wheel chocks. In a shop environment, caged chambers are acceptable for the duration of the maintenance procedure. For a vehicle awaiting parts, the vehicle must remain chocked and clearly marked as out of service throughout. Leaving a vehicle in this state for days or weeks without repair is both a safety hazard and a regulatory violation if the vehicle is accessible to drivers.
Caging a brake chamber is one of those procedures that every commercial vehicle technician and fleet maintenance professional needs to understand completely — not just how to do it, but why it is done, what it removes from the vehicle's safety system, and what must happen before the vehicle can move again under its own power. The power spring inside a spring brake chamber is an engineered safety device of considerable force; treating the caging procedure with the respect it demands is the difference between a controlled, safe maintenance operation and a serious incident.
When the brake system is repaired, the air supply is confirmed, and the chamber is properly uncaged and tested — the vehicle is safe. Until then, the caged chamber is a clear, visible signal: this vehicle is not ready for the road.


